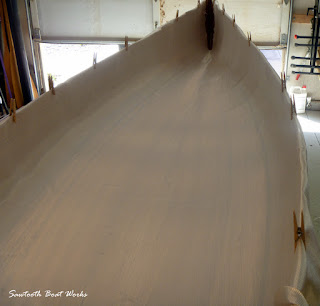
The process of fiberglassing the interior of the hull is very similar to what was done on the exterior but a few of the steps are very different. Planing and sanding the exterior planks is much easier and when the hull is completed, the exterior is generally fairer than the interior. When planking the hull, I always try to justify the planks so that the interior will need a minimum amount of work even if it results in the exterior being a little rough (which can be easily remedied).
Hours (and hours) are spent scraping and sanding the interior to get everything just right. Fairing the interior is much more difficult than fairing the exterior.
Before fiberglassing, a fillet must be formed around the lower part of each stem. This fillet has two purposes. It will add strength to the part of the hull that takes the most abuse and also gives the fiberglass a surface it can conform to.
This photo shows the make-up of the stem. Outer stem, inner stem, fillet on each side for the interior fiberglass strip to lie on.
The fiberglass is carefully laid out and fitted to the curvaceous interior. Much care is taken to do this without snagging the fiberglass on trimmed exterior fiberglass along the gunwales.
We avoid distorting the fibers by using a four-inch wide, soft bristled paintbrush to conform the fiberglass to the hull and to smooth out the wrinkles. Some snags and imperfections are inevitable but can be worked out using a small pick and a stiff bristled brush (i.e. toothbrush). Sunlight on the finished boat will show these flaws if not taken care of now.
The fiberglass is difficult to work into the stems, so we do this in several stages. First, a three-inch strip is wetted out down the center of the stem. Then, fiberglass pieces about 18 inches long are wetted out on each side of the stem (overlapping the three inch strip). Then the main piece of fiberglass is fitted and trimmed so that it overlaps the 18 inch pieces. This method is much, much easier than trying to do it all in one piece.
Finally, the main section is wetted out. Two or three more coats of epoxy will follow this.
Showing posts with label fair curve. Show all posts
Showing posts with label fair curve. Show all posts
Thursday, September 15, 2011
Sunday, March 20, 2011
Planking the Sides
When the forms are set up at the appropriate spacing to result in the desired length canoe, the sheerstrake is installed. Much care is taken to make sure this plank has a fair curve to it because this determines how all of the following planks will lay.
Planks are normally stapled to the forms, but we have added outer ribs to the forms so that they can be clamped using wedges. This adds to the aesthetics of the canoe by eliminating all of the small marks left on the finished canoe by the staple holes.
Small dowels are placed in the fragile cove edge to protect it from the bungee cord (which also clamps the planks together). Dowels are only used in the bow and stern areas where planks will be added later. Protection isn't needed in other areas because that edge will be sanded flat and will be part of the gunnels.
The planking progresses by adding planks to alternating sides. This is where the numbering on the planks is used to keep the color scheme similar on each side. This is most important when planking the bottom because both sides are seen next to each other.
On this canoe, the dark accent strips were taken from a very dark cedar board and the white strip is from a spruce/pine board.
More planks will be added where the blue tape is after the bottom has been completed. The added planks will make up the raised bow and stern section which will give it a traditional look befitting of this type of canoe.
Labels:
16' Cedar Strip Canoe,
cove edge,
fair curve,
forms,
length,
planking,
sheerstrake
Subscribe to:
Posts (Atom)


