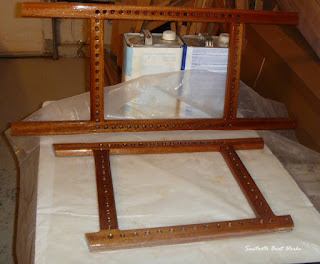
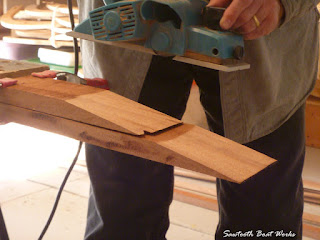
Mortise and tenon joints are used to join the seat parts.
Holes for the cane are drilled and chamfered. The edges are rounded over with the router before sanding the frames. Before varnishing the frames, they are fitted to the canoe.
The seat frames are sealed with a coat of epoxy before applying three coats of varnish.
The seats are hand-caned with a synthetic cane, which is much more durable in the marine environment than the natural cane.
Thursday, September 15, 2011
Decks and Bulkheads: Assembly and Installation
Decks and bulkheads are used at each end of the canoe to make up a flotation chamber in the stern and a flotation/storage chamber in the bow.
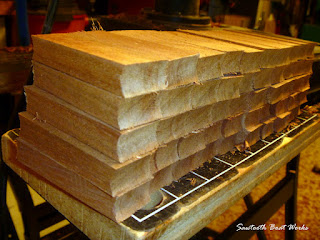
The cedar strips are glued and clamped together to make an oversized blank that is later cut to size. Many more clamps were used than are shown in this photo.
A nautical compass rose made up of various hardwoods is added to the bow deck before the cedar blanks are sanded smooth and before fiberglassing both the front and back sides. Multiple coats of epoxy are applied to the fronts so that they can be sanded smooth without exposing the fiberglass.
The bulkheads are fitted and then attached to the hull using epoxy/wood-flour fillets. This photo shows a bulkhead being installed. Masking tape is used to control the size of the fillet and minimize the cleanup. Note, that a mahogany steam-bent deck support has been added along with a deck support beam.
The decks are epoxied in place. It takes quite a few clamps to get the deck to conform to the upward curve of the bow and stem.
This photo shows, from the underside, how the deck is left proud of the curved support beam while being epoxied. Once the epoxy has cured, the curved edge of the deck will be cut flush by using a router with a flush trim bit.
Here is the finished product:
Installing the Gunwales
After spending many, many hours sanding the epoxy on the interior and exterior of the hull, we are ready to start building again. The gunwales are the next step. The scuppered type that we install are more work than most other types, but we feel their good looks are worth the extra effort. The scuppers give the traditional look that canoes had when ribs extended between the inwale and hull. The scuppers also allow all of the water to be drained from the canoe when tipping it on its side.
We needed lumber about 16.5 feet long for the gunwales so we scarfed an extra section on to the end of the piece of African Mahogany that we chose in order to get it to the necessary length. An 8:1 scarf was used.
The scupper pieces are cut to length with a drill bit to give then a radius on each end. About 50 of them are used.
The scuppers were then epoxied in place on the sanded hull.
The breast hooks were then installed at each end.
The inwales came next...
...followed by the outwales. The outwales are different from the inwales in that the last three feet of each end has been tapered to a narrower depth. This gives the ends of the canoe a much finer look which really improves its appearance.
Some creative clamping is required in order to coax the gunwale into meeting the rise at the end.
All of the pieces come together to form a strong, rigid hull.
Preparing and Fiberglassing the Interior
The process of fiberglassing the interior of the hull is very similar to what was done on the exterior but a few of the steps are very different. Planing and sanding the exterior planks is much easier and when the hull is completed, the exterior is generally fairer than the interior. When planking the hull, I always try to justify the planks so that the interior will need a minimum amount of work even if it results in the exterior being a little rough (which can be easily remedied).
Hours (and hours) are spent scraping and sanding the interior to get everything just right. Fairing the interior is much more difficult than fairing the exterior.
Before fiberglassing, a fillet must be formed around the lower part of each stem. This fillet has two purposes. It will add strength to the part of the hull that takes the most abuse and also gives the fiberglass a surface it can conform to.
This photo shows the make-up of the stem. Outer stem, inner stem, fillet on each side for the interior fiberglass strip to lie on.
The fiberglass is carefully laid out and fitted to the curvaceous interior. Much care is taken to do this without snagging the fiberglass on trimmed exterior fiberglass along the gunwales.
We avoid distorting the fibers by using a four-inch wide, soft bristled paintbrush to conform the fiberglass to the hull and to smooth out the wrinkles. Some snags and imperfections are inevitable but can be worked out using a small pick and a stiff bristled brush (i.e. toothbrush). Sunlight on the finished boat will show these flaws if not taken care of now.
The fiberglass is difficult to work into the stems, so we do this in several stages. First, a three-inch strip is wetted out down the center of the stem. Then, fiberglass pieces about 18 inches long are wetted out on each side of the stem (overlapping the three inch strip). Then the main piece of fiberglass is fitted and trimmed so that it overlaps the 18 inch pieces. This method is much, much easier than trying to do it all in one piece.
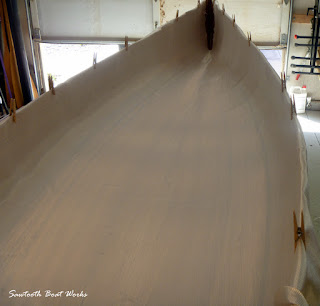
Finally, the main section is wetted out. Two or three more coats of epoxy will follow this.
Labels:
fair curve,
fiberglassing,
fillet,
interior,
planing,
sanding
Subscribe to:
Comments (Atom)


