When the side planks have been completed, one side of the bottom will be completed before starting on the other side of the bottom. Each plank must extend past the centerline so that it can be trimmed to the centerline later.
Once the centerline is marked on the bottom, the planks are rough trimmed to the line using a sharp chisel. Because of the way the grain of the wood intersects the centerline, it is always best to start in the middle of the canoe and work towards the ends.
The trimming process is finished up with a couple of small planes. Small spacer blocks are put between the hull and the molds to raise the hull enough so the plane clears the molds.
Friday, March 25, 2011
Sunday, March 20, 2011
Planking the Sides
When the forms are set up at the appropriate spacing to result in the desired length canoe, the sheerstrake is installed. Much care is taken to make sure this plank has a fair curve to it because this determines how all of the following planks will lay.
Planks are normally stapled to the forms, but we have added outer ribs to the forms so that they can be clamped using wedges. This adds to the aesthetics of the canoe by eliminating all of the small marks left on the finished canoe by the staple holes.
Small dowels are placed in the fragile cove edge to protect it from the bungee cord (which also clamps the planks together). Dowels are only used in the bow and stern areas where planks will be added later. Protection isn't needed in other areas because that edge will be sanded flat and will be part of the gunnels.
The planking progresses by adding planks to alternating sides. This is where the numbering on the planks is used to keep the color scheme similar on each side. This is most important when planking the bottom because both sides are seen next to each other.
On this canoe, the dark accent strips were taken from a very dark cedar board and the white strip is from a spruce/pine board.
More planks will be added where the blue tape is after the bottom has been completed. The added planks will make up the raised bow and stern section which will give it a traditional look befitting of this type of canoe.
Labels:
16' Cedar Strip Canoe,
cove edge,
fair curve,
forms,
length,
planking,
sheerstrake
Saturday, March 5, 2011
The Cedar Strips
The cedar was ripped into 1/4" x 3/4" x 17' lengths. The strips were cut slightly thicker than 1/4" and then were planed down to exactly 1/4". Milling the planking to tight tolerances should pay off later in reduced sanding.
The planks were separated by color and then numbered accordingly. This will assist us in getting an even pattern from side to side and make the canoe more aesthetically pleasing.
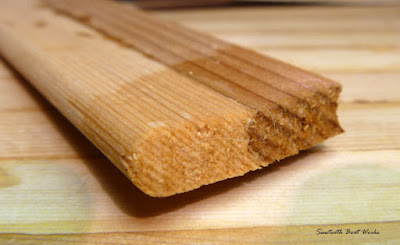
Bead and cove edges are put on to the edges of the planks. This allows for tight seems in the curved sections of the hull.
The planks were separated by color and then numbered accordingly. This will assist us in getting an even pattern from side to side and make the canoe more aesthetically pleasing.
Subscribe to:
Comments (Atom)


